Wednesday, March 28, 2012

All the Element Quilts!

I'm late getting to this, but I am sure you all understand why.  But now it is done, and here they are.
Now let's see if I can remember who did what!

Top row:  Linda's, Barbara's, Nedra's
Second row:  Judy S's, Patti's, Kathy's
Third Row:  Rita's, Judy W's, Sara's
Fourth Row:  Andrea's, Alice's, Carolyn's
Fifth Row:  Petra's


As usual, they look so great all arranged together!  

Some suggestions for photography next time:  (1) If at all possible (and now that it's spring, it ought to be!), take your photo in natural light outside; (2) Take the photo "straight on"--Not hard to do if you tape it to a piece of foam core or even poster board; (3) Crop your photo before posting.  I had to do some cropping, and you might not like the way I did it!  (4) You don't need to put your camera on the highest resolution, but put it on a setting such that the picture is sharp and clear.

As for the natural light:  I took two of my quilt, one inside and one outside.  It was amazing how much brighter and truer the colors were in the photo taken outdoors!

Friday, March 16, 2012

And the next challenge word is........................

Good morning sister quilters,
     Yes, I know, this has already been posted (Thank you, Alice) but it just seemed I needed to do this or I would not be fulfilling my Material Mavens responsibilities.  And the word is......MYSTERY.
     And, what can I say but Wow! for all of the Element quilts.  It is so much fun to see how each of us interprets and executes the same word.  And it will be double fun for me in two months to see what Mystery means to each of you.  Rita

Thursday, March 15, 2012

Sara's Elements of art - line


My quilt is based on the elements of art. I pieced Improvisational blocks with skinny strips - when faced with an inability to get a sewing machine to work, I resorted to hand quilting lines and dots with embroidery floss. I think it was a fortuitous problem as now the quilt speaks of rhythm as well as line.

I really loved this challenge. My first thought was the periodic table since I spent many years in chemistry classes. Hmm - can I say that my quilt was made if Helium and floated away? I settled on line since I remembered a sensory perception class I took with Susie Monday in which I clarified that I notice line and rhythm when I look at a scene. I liked this challenge so much that I even started another quilt which did not get done do to many life challenges, QA and the sewing machine that would not work. I do plan on finishing and posting that one too.

Judy W's Element of Simplicity: No Excess

My Element idea is a bit obscure yet quite meaningful in regard to my focus on simplifying my life in 2012.  Simplicity (like Elements) will mean something different to everyone.

All my choices were symbolic.  The design is uncomplicated, focused and simplistic with an overall depiction of my targeted goal.  The red ribbon X is emphasizing NO as well as the cross hairs of a target.

My fabric choices hopefully convey the following... black chicken fabric is akin to running around like a chicken with my head cut off when I complicate my life with too many choices, tasks or thoughts.  I feel like I am in the darkness of confusion.  The white clock print fabric reminds me of time constraints and choosing what is important and letting go of the unnecessary.  It is lighter in appearance and so is the feeling that follows with accomplishment and letting go.  In choosing the solid yellow gold fabric, I eliminated all distraction and reached the bulls eye of my target - by eliminating Excess (XS), and achieving the ultimate element of simplicity.

Finishing details include a narrow red ribbon crosshatch to indicate a target (goals), a kumihimo (Japanese Braid) embellished inner circle that defines and honors reaching my goal of simplicity in life, and concentric quilting lines radiating toward the center of my focus.  Lettering is a bold black embroidered reminder to stay true to the Element of Simplicity by eliminating Excess in my life.

I used fabric glue to adhere the ribbon and braid. Quilting stitches anchor the ribbon but I chose not to couch the braid unless it indicates that necessity later.

Element - Patti Brooks - Too Hot to Touch

I decided to do an "element" on the stove after being inspired by a workshop by Libby Lehman where she was using the circular attachment on her Bernina. I had bought the attachment with some birthday money and hadn't used it. This piece is reverse appliqued with decorative stitches. I then couched the copper wire as my element with the Cu design from the periodic table for copper. Though I had fun working with the circular foot, the colors were rather heavy. I also added angelina fiber in the center for intensity. My dad used to tell me to get off the "back burner" whenever I was going too slow in some task. I felt like I was making this one for him. Used this technique to make my friend a quilted case for her "netbook" at the same time I was working on this project. Really enjoyed working with the circles and got to play with the decorative stitches on my machine. Patti

Kathy's ELEMENT


It was so interesting to read the other MM postings and discover that so many of us had almost immediately thought of the same ways to describe "Element." The Periodic Chart of Chemical Elements came to mind right away - I even printed out a Chart and was trying to figure out how I could get the chart onto a 12" x 12" quilt. The TAPS (Transfer Artist Paper) process could be used, but I've already somewhat 'conquered' that method (well.... sort-of conquered it!) and I wanted to do something different this time. Back to Webster's Dictionary where, as Rita has already discussed, one of the definitions referenced the bread and wine of Holy Communion. I'm Roman Catholic, and my next quest for information took me to the U.S. Conference of Catholic Bishops' (USCCB) website that referred to "the consecration of the elements [bread and wine]" of Communion. With that definition in mind, my direction changed from Chemical to Liturgical !
My quilt is highly symbolic in that it uses the stylized wheat stalks to represent bread, and a large Communion 'host' (wafer) to represent the consecration of the bread into the Body of Christ. The lower portion of the quilt uses several sections of "grape-y" colored fabrics to represent the grapes that are converted into wine that will be consecrated into the Blood of Christ. If you could see that section up close, you'd notice several 'seeds' that have been encapsulated in blue tulle netting. The 'watery-type' metallic threads represent the waters that are necessary for the elements of wheat (bread) and grapes (wine) to grow into harvestable forms.
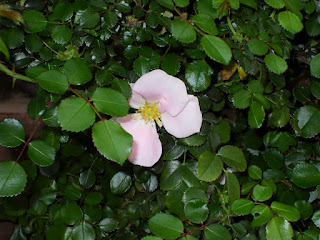
The third picture on this posting really has nothing at all to do with my little quilt.... I just wanted to share with all of you a beautiful pink rose that's blooming in our yard here in Central Texas. Welcome Spring and Thank You God for the beautiful elements you provide for us in all your wonderful ways.


Carolyn's "In Her Element"


I thought of all the numerous meanings of the word, "element" and decided right away that I wanted to do something different and quirky. Turtles live in their "elements", so I decided on a design that featured a female turtle in her elements - her shell and the water. My inspiration came from Philadelphia artist, Lynnette Shelley, who creates mosaics of her Hawaiian memories.

I drew a female face on the turtle with lipstick, rouge and long eyelashes, and then topped her head with a flowery hat. I added sea plants and grasses that are also in their "element" at the bottom of the sea.

Machine piecing, raw edge fusing, machine quilting and hand embroidery highlight my fun design.

Petra's Element Quilt


What a famtastic theme, something to really get my teeth into. However I am sooooooo disapointed with my quilt. I was thinking along the same lines as Alice and I was going to make 4 different kinds of fabric - 1 earth dyed, 1 burnt etc but time or the lack of it got the better of me. I might revisit this theme at a later stage. I was thinking of the point where the sea meets the beach and the interaction of sand and surf.
My quilt is made with indigo and potassium permanganate dyed fabric which I dyed myself. It's then free rotary cut and then pieced. I still liked it at this point. I liked it untill after I quilted it but hated it after I put the piping and binding on but by then too late xx Will try harder for Mystery.

Barbara's Element Quilt-Earth View

I knew almost right away that my element would be earth. I have wanted to show, in a quilt,the topography of Mission Trails Regional Park which is about 3 blocks from my home. This was my chance!!
I tore and wove strips for the background in a technique learned in Jane LaFazio's Art Quilt Classes. I laid some hand dyed organza on three areas to make them darker and then some light green tulle over the whole piece. To make the contour lines, I couched yarns with mono-poly thread on the machine. There is not a speck of Wonder Under in the whole piece!! There is white glue, however, to hold the yarns in place before couching. Yes, I have the couching foot on my machine, but it's much easier to use glue and a walking foot!
The hand dyed cotton and organza and the specialty yarns came from a friend of mine who had to move to assisted living and couldn't take everything with her. I helped her daughter sell her stash and know her hand dyes will be used in many art quilts all over San Diego and is going to be used for napkins in an upcoming Florida wedding.

Nedra's Element - Geranium


Two things came to mind when I first thought of our new topic- design elements and chemical elements.  The scientific side of me kept taking over as I mulled the exciting possibilities – gold, silver, cobalt, copper, iron.  I had many pictures swirling around in my head.  Why, I’m not entirely sure, but I googled the periodic table and realized there were many strange elements I had forgotten-molybdenum, lawrencium, americium, germanium.  Ha, that last one sounded interesting. An element named after Germany?  Drop an m and you have geranium.  Geranium – Now wouldn’t that be a beautiful element and thus I envisioned this modified version.

I found a drawing of a geranium by Inge Jacobsen which I modified a bit, then printed a copy and traced onto fabric.  I painted the geranium flower and leaves and then fused it to my background fabric, which reminded me of atomic particles. I fused the symbol and atomic number to the piece and then machine quilted the atomic particles to complete my depiction of  this fictitious member of the table.  

Linda’s Quilt: 4 or 5 elements for graphic expression


     In ancient thought, Fire, Earth, Water and Air and sometimes Spirit (something beyond the physical world) are the classical elements, the root units from which the world is formed. Hopefully the elements work in harmony!

     Today, these early descriptions of elements are used in writing and graphics, paintings, tarot and astrology. In my stash, I found fabric to represent each physical element and separated them by curvy quilting. The gold represents the spiritual.

     I cut gold fabric to which I had ironed Wonder Under. I punched a hole in the center of the square piece of fabric and cut a spiral from the center all the way around and back again. I fused the first spiral on the front and what was left on the reverse of the 12 x 12. I squeezed puff paint to edge the activating spiral, sprinkled gold beads atop and on the bottom, and used a hair dryer to secure. I believe I like the back better than the front.

Andrea's Element Quilt


Black & White With An Element of Silk

With this theme I came up with many "working" ideas very quickly ( which was comforting ), however I decided that I wanted/needed to make something intuitive, as I have a tendency to "over-think" my designs. I bought a Gel Printing Plate a few months ago and have been wanting to play with it, so I decided that this was my opportunity to give myself "permission" to explore.
To simplify, I only printed with white paint on black fabric and black paint on white fabric. My element would be a "pop" of color, which I thought the contrast of the silk would work.
This is the result.

Rita's Liturgical Elements

     As a retired science teacher, the only thing that came to mind was the Periodic Table of Elements when the word Element was posted.  I briefly considered doing one of the chemical elements such as gold because some of those certainly bring an image to mind.  But then I decided to see how Mr. Webster defined the word Element.  There I found, when used in the plural, "the bread and wine used in the Eucharist".  That would be my 12 x 12!
     Our church has just completed the construction of an attached chapel to the original 1879 structure.  The altar ware selected for the chapel is beautifully glazed earthenware.  This quilt is my attempt to depict those two lovely pieces.  I worked from a photograph taken by my husband, Randy.
     The stained glass background is composed of 60 degree diamonds of Fairy Frost fabric held in place with black 3/8 inch bias strips that were stitched in place with a double needle.  The fair linen is made from part of a 50 year old lace edged handkerchief.  The alter ware and wafers are fused and topstitched. The finished quilt is then wrapped around a 12 inch x 12 inch x 3/4 inch wooded frame.

Alice's Element Quilt: The Four Basic Elements

The Four Basic Elements:  Air (Sky), Water, Fire, and Earth


The ancient philosophers believed that the world and everything in it was composed of four basic elements: air, water, fire, and earth. My quilt is an abstract design using batiks that represent these four. One of our Mavens commented last time (and she meant this as a compliment, certainly NOT a criticism) that I often used realistic images in my 12 x 12 quilts. "Ah ha," I thought, "time for me to try an abstract!" So the inspiration for this Element quilt was two-fold--the ancients' beliefs about these elements and a fellow Maven's comment!

I first made many sketches using free-flowing and curving lines, with only the flames hinting at realism. When I finally came up with a design I liked, I used it for my cartoon. I traced the resulting shapes onto tracing paper to make templates.  Previously I had chosen four sets of batik fabrics that spoke to me of air or sky, water, fire, and earth. These I had then prepared with Wonder Under. I cut out the shapes using the paper templates and fused them down onto polyester felt for batting. I used the original cartoon to guide me in placement of the many shapes. I added in a few others where I felt more were needed. Finally, I echo quilted inside each shape by machine.

Actually, this quilt, fortunately begun well before our tragic family event in February, is two-sided. I first tried a technique I've long wanted to try, string piecing. I used the same batiks that ended up on the front and many other fabrics as well.  I thought it was striking, but it didn't have quite the look I was hoping for.  It seemed too structured, too traditional. It was too pretty to discard, though, so I decided to use it for the backing.  


Wednesday, March 14, 2012

Judy S. "Element's of Art"

When the word "Element" first came to mind I was in an art gallery and I thought, "What are the elements in these pieces of artwork that make me like them?"

There are the elements of art that the artists think of when they are creating the artwork and then there are those things that really draw us to those pieces that speak to us. Every place I go I try to visit a museum, art gallery, quilt show, festival, or craft venue. I have many creative friends and family members who always share the beautiful things they are making and it feeds me.

A room with pictures was where I wanted to go with my quilt. How was I going to do that since I don't really draw? I did do a drawing, but it was just for an idea since that drawing was never going to come to life.

For artwork I pulled some stamps from a vast collection that my sister brought to my mom's house one summer. The first step was to get the paper and glue off of the ones I wanted. Then I stitched a frame with a satin stitch on muslin. Libby Lehman taught a class where she showed how to miter the corners by dialing the width of the satin stitch down and back up. My corners are mitered on the frames, but since I used a solid brown it doesn't show and in some places that is a good thing.

I used tacky glue to adhere the stamps to the muslin and to turn the edges under. Stitching just inside the frame attaching them to the wall made the frame stand out so that there is a shadow under the picture. The cream colored wall makes the pictures (stamps) show up the best. I found the wood like fabric and knew that was going to be a great floor.

To get my "thoughts" out there I wrote them on white fabric and cut them out like thought balloons and randomly placed them on the quilt. When I showed my work in progress to one of my fellow artists in the studio area, she suggested putting in the baseboard to help it give more of the feel of a room. She also suggested that I just write the words on the wall. Hmmm. When I put the baseboard on it helped a lot. I decided to quilt the words on.

Now to get "Me" into the quilt. I like red and found a fun print for my blouse. Then there was the head. Ahh, the back of the head would make it so that you would be looking into the quilt. No eyes, nose, or lips to deal with. I cut out a head just so that there would be a shape to work with. I put 2 different colors of brown thread on the machine and threaded them both through the needle. Then I squiggled and wiggled. There were 2 layers of tear-away stabilizer under it so that it wouldn't draw the fabric all up.This was a fun project and it stretched me. I really wanted this look and it has turned out, but I didn't know if I could get all the components to work with me. It is nice to see something come together.

Friday, March 9, 2012

Quilting Adventures MM's

Four Material Mavens were able to meet at the Quilting Adventures seminar. Alice was supposed to be standing in the front of this line, but she gave me her spot and we missed her dearly. We are standing in front of Jan Krentz's quilt. It was a week of stunning work and fried brains. I think we used every brain cell available! We did work on growing the cell's back by eating our fill at the meals and not missing any desserts.
Here is Carolyn and her teacher Laura Wasilowski in front of her beautiful cactus quilt. Not only did they create wonderful art, but they also learned songs and choreography that they performed in front of the whole seminar student body. This is the best kind of camp any quilter can dream of going to.
They are singing and pressing and truly entertaining us!
Sara was in Vikki Pignatelli's class. They learned a ton of techniques. As you can see she has lots of fun pieces that she worked on. This was a class where so much information was given that Sara's sewing machine just sat down and decided that it couldn't do all that it was supposed to do.
Rita and I were both in Lenore Crawford's class. As you can tell we had a lot of grins and giggles in our class. Lenore said, "I'm supposed to be pointing to something when we take pictures right?"

My yellow door quilt on the right is not complete yet, but this is how far I got on it in class. There is very little painting on the quilt right now and there is no paint on the yellow part of the door. That is all fabric. I took the photo on the left when I was in San Antonio and Lenore's class brought it to life.
Rita is hard at work on her castle quilt in Lenore's class. A lot of cutting and fusing was done. New iron's took a hit on cleanliness after all the fusing. At least we know how to clean them well. Make sure that you don't wait too long to clean it or it can be permanently crusted over.
This picture was taken before Rita started to add the paint. She did get started on that today and Lenore showed her how to add depth to her quilt with just little touches of paint . She really wanted to get those windows on the castle.
Here is the main building where we spent the week at T Bar M. The top floor was where Rita and I had our class. The bottom floor was where all our delicious meals were served. The part of the building to the left was where Sara's classroom was and the Quilt Haus quilt store was set up in there too so that we would have more fabric and supplies to choose from. It was a wonderful week of learning, eating, friendship and fellowship with so many ladies who love to quilt!